Create a New Master Icon
This part provides information for adding a new master icon to a stencil that can represent a custom AgileShape.
-
Close AgilePoint Envision and leave MS Visio open as shown below.
- Click File > Open.
- Navigate to the folder where the VSS files are stored (e.g. C:\Program Files\Microsoft Office\Office12\1033\Solutions\AgilePoint) and open the new stencil (i.e. IT Assets Group 1).
- Right-click in the new stencil pane and click New Master.
- Give the new master a descriptive name (e.g. Procurement Algorithm). It is recommended to choose Normal (32 x 32) for the icon size and to leave the behavior checkboxes unchecked.
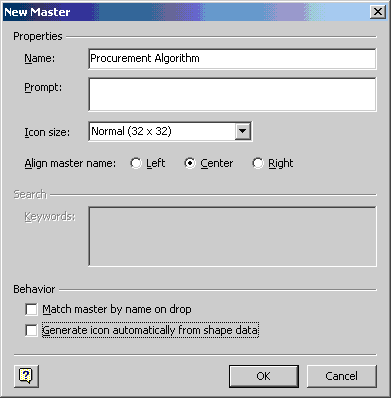
- Click OK.
- Right-click on the Procurement Algorithm activity in the stencil pane and click Edit Master > Edit Icon Image.
NOTE: Icons are generally created by your computer graphics design department. It is recommended to use 32-bit icon images. You can either draw one by hand or copy and paste an existing icon.
- Either draw an icon pixel by pixel, or simply copy and existing icon and paste it here.
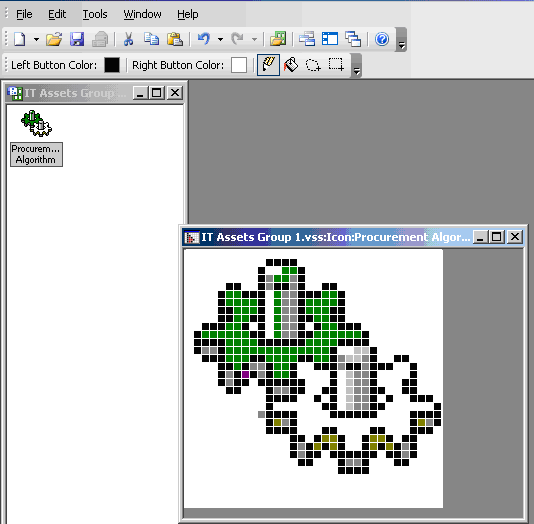
- When finished, close the icon window.